5. Repeat step 4 until you run out of padded surface or the side seam is reached. Do not cut the lace.
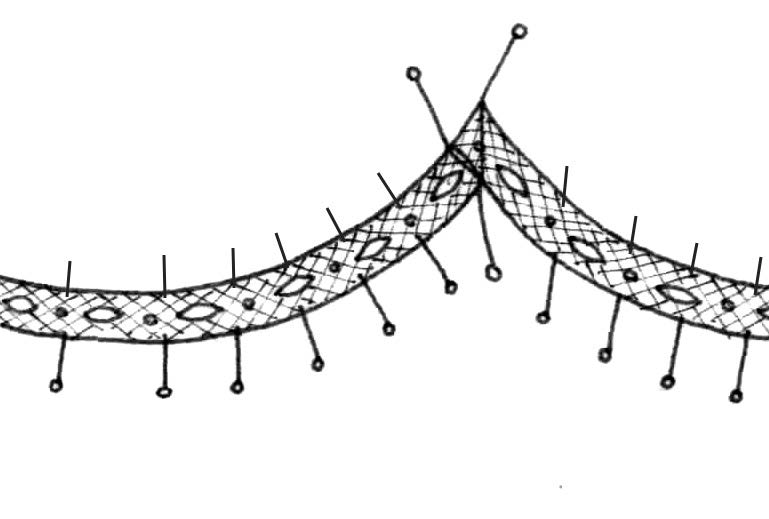
6. Look at the inside of the lace loop (floppy lace edge) and identify the gathering thread at edge of the lace in the heading. It is the very, very outer thread in the heading. Sometimes it will look like a tiny scallop at the very edge of the heading. Using a straight pin, grab that thread and pull. This will form a loop in the gathering thread. Pull on the loop, one side and then the other, until the inside of the lace flattens against the fabric. Stick a pin inside the gathering thread loop to keep the gathering thread taut along the inside of the lace loop.
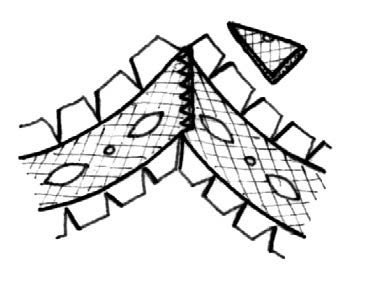
7. Repeat step 6 for each shaped scallop by finding the gathering thread along outer miter point, pull the thread, causing the inside floppy edge of the lace to flatten (fig. 1).
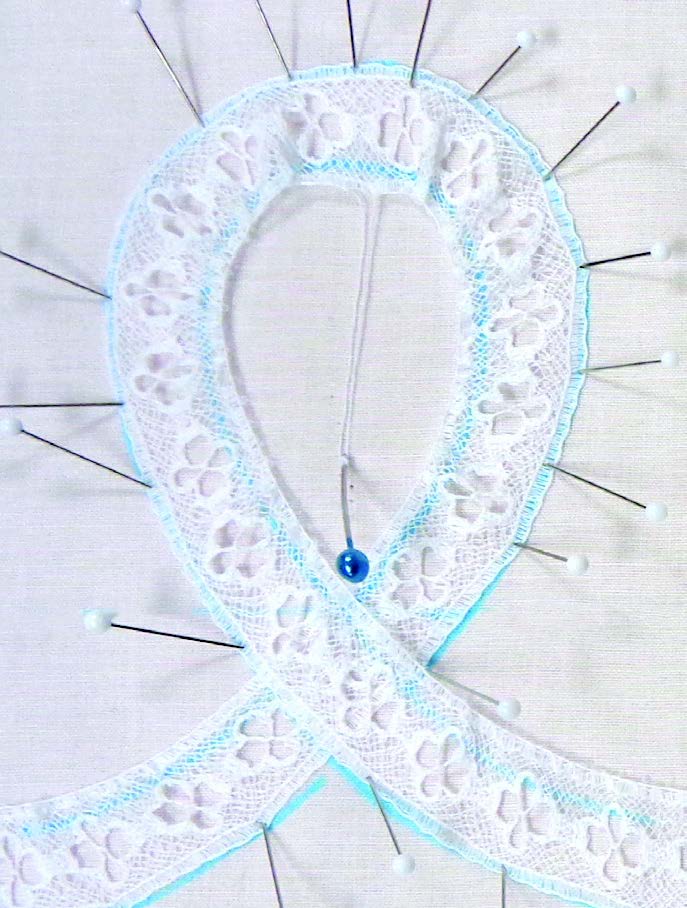
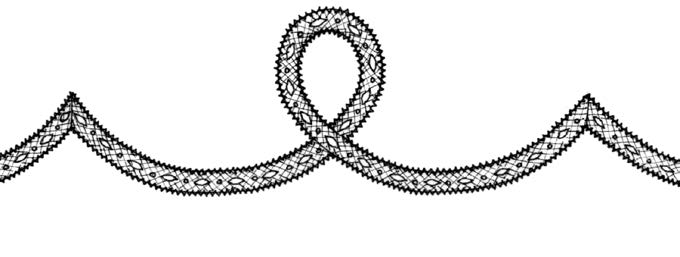
8. Starch lightly and press with an iron, pressing right on top of the glass head pins. Press using an up and down motion, not a side-to-side motion, and press until dry (fig. 2).
Tip: If you accidentally spray too much starch on the lace, making the area very wet, use a blow dryer to dry the area before pressing. If it’s too wet, the lace/fabric might stick to the bottom of the iron.
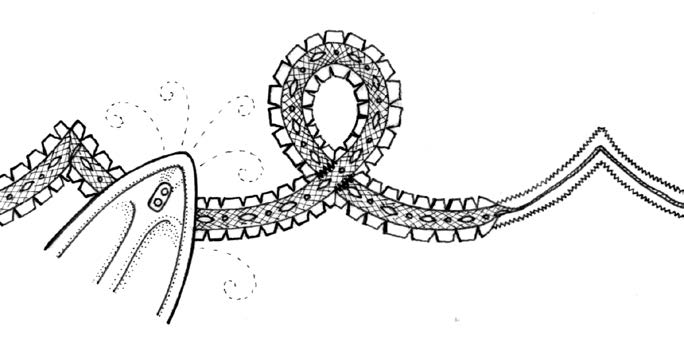
9. Remove pins gently from padded surface, one at a time, and pin the lace to the fabric. Remove from the padded surface (fig. 3).
10. Continue shaping the remaining lace scallops until all scallops on that side have been shaped (steps 7-9).
11. Starting on the other side of the center lace loop, repeat the shaping and mitering process until all scallops on the remaining side have been shaped (steps 7-9). At this point, all of the lace should be shaped and pinned to the fabric and removed from the padded surface.
STITCHING
1. Place lightweight tear-away stabilizer on the wrong side of the fabric behind lace.
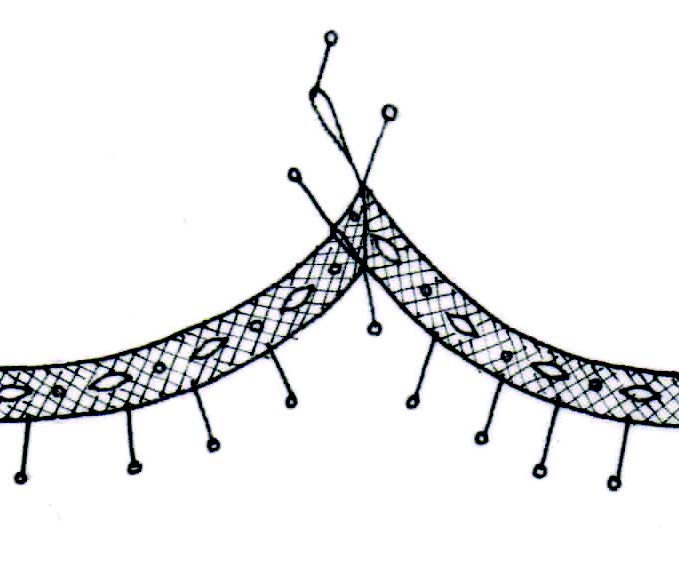
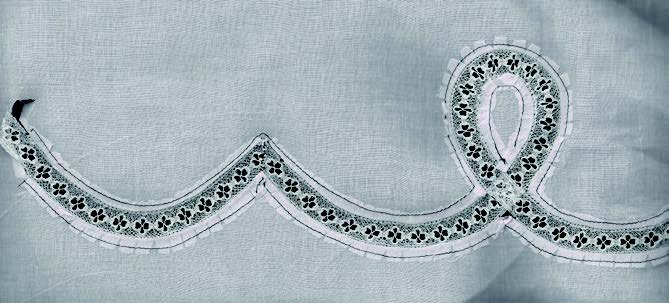
2. Stitch the lace to the fabric along both headings using a straight stitch or a tiny zigzag (L=1.0, W=1.5) but DO NOT stitch the lace intersection at the bottom of the loop or through the folds of the lace miters at the scallop points (fig. 4).
NOTE: Pivoting is so much easier with use of the knee lift.
NOTE: All stitching is done with black thread in the photos for visibility. On the actual garment, use white to match lace.
3. Turn the skirt to the wrong side and remove stabilizer. Carefully make a cut in the fabric behind lace, centering the cut between the lines of stitching.
4. Clip fabric at the curves, starch lightly and press the fabric away from lace (fig. 5).
Optional: Baste the fabric “tabs” in place on each side of the lace about ⅛-inches from the cut edges (photo 5).
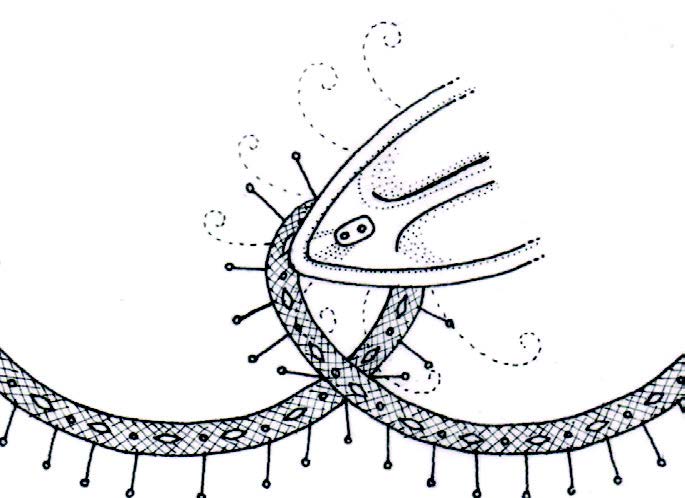
5. From the right side, stitch a tiny zigzag along the headings of the top lace at the loop intersection and along the folds of each lace miter. Cut away the lace close to the stitching on the underside at the intersection and the “extra” lace at the miters (fig. 6).